Creations

Creations

Friday, April 19, 2013

Another Trash to Treasure

A few weeks back, my kids and I went to town for a few things. We were looking in second hand shops for a new record player for my middle son since the needle broke on his,(he is nearly 15 with a love for old classic rock vinyl)- anyhow, i came across a few wooden jewelry boxes and i picked them up for nearly nothing and decided that I was going to alter them. The first one turned out great. The second one I found I knew would be a challenge. I'm not gonna lie... it intimidated me.
 The back looked simple enough but there was do much space to cover on the front.
I starred at this project for nearly two weeks before I decided to give it a go. I gathered up my supplies, picked out a packet of paper I have been hording and set in for the challenge.
I started by measuring ever space i was going to have to cover. I wrote all the measurements down and drew a low budget sketch of my plan. 
I decided that this project was going to stretch over a few nights of work so i tried not to rush anything.  I began working on the hardest parts first.  I had never used glittered paper for a project before and although it was looking very pretty, it was sure hard to work with.


I am not a big expert with "Modge Podge" and it has taken me some time to figure out that you have to be careful or the paper will bubble. I applied a light coat to the wood and an even lighter coat to the paper.
On the areas that contact was critical, I used Tacky tape. I love that stuff... a little spendy, but in the long run, well worth it. As I worked through the first day, it started to come together pretty nicely.

As I cut out the framed edges for the front doors i knew that I was going to have to come up with something to make it look decorative, it was in fact the front of the piece. I reached for my silver Stickles. It matched to glittery paper I was already using. I carefully squeezed the stickles around the arch. **Important Note** Stickles drying time has a mind of its own and touching it before it is really dry makes for a frustrating experiences.. Three touch ups later, that part was done.

I decided to stop while I was ahead and re-visit it the next day. I had an entire day to think about my next steps. When I got home from work, I started working on the back. The back was much easier than the sides, lots of flat surfaces:)

Before too long the back was complete and I decided to wait to finish the top and the base of the piece. I needed to figure out a way to work around the piece of glass in the bottom drawer. It was glued in place and I knew if I tried to remove it, I would most likely break it... ( i am not to shy to say I am very clumsy).

The Piece was really starting to look good and already I was looking forward to embellishing it with something to add that POP!
The sides and back were just about done.. it was on to the base.
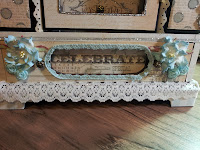
The glass piece I was concerned about proved to be the hardest part. I literally had to hold the paper and with my finger crease the oval shape. I cut out the oval... trimming a hair off each-and-every time...  until I got it to slip into place. That process alone took about 25 minutes, but at last, it was just the perfect size to slip in that area.

On day three I could see the end in sight. A few more cuts and I would be done. The paper I used was "Lost and Found". I love the blue and brown idea... and the cowboy was pretty darn cute too.

Wednesday, April 3, 2013

From Trash to Treasure


What do you get when you mix an old beat up jewelry box from the thrift store and some paper, glue and paint?

You get a jewelry box full of glue, paper and paint ofcourse.

Sounds kind of obvious really, BUT if you mix in some time, some creativity and a few extras here and there.... you will get one great gift idea.


I don't do "down time" well. When my kids are gone to their fathers, I sometimes feel like the house is too quiet, and there is nothing to do... that is when I can focus in on some quality creative time.


To see more Trash to Treasure ideas, visit my facebook group:
I started this group to showcase the things that I would get or buy from others online, things they had no use for but that I had endless ideas for. Over the last year, we are over 100 members strong and continuing to share ideas and tips. Join us if you'd like. Inspiration is best served Shared :)

Tuesday, April 2, 2013

Thift stores.... a great place to find amazing things to play with.

$3.98 cents for this little jewel.... A mail sorter from days gone past.. The little dividers were missing, but there was no reason to pass up an opportunity to make it workable.. a little time, patients and paper... and it would make a great decor item.

Picked the paper...

    found some ribbon....

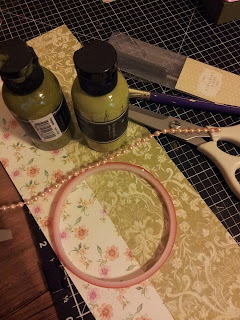
          Grabbed my scissors, a ruler and some glue...

And created something usable.

So very Happy to use my stash of stuff.


Ribbon is Stampin' Up

Bling is Websters Pages

Punch is Marvy

Flowers are from a friend...


And another creation is Born.


Inspiration comes from many things...

Or in this case... many people. I started blogging this year and I can tell you that I have no idea why I waited. There are so many amazing and talented people that I have met on this journey. I am truly inspired to think a little more out of the box and create things that are truly pieces of "My kind of Art".
I got this little organizer at a yard sale years ago. I always knew that I wanted to do something with it, but never really took the time to make it happen.

Recently, a friend of mine who is extremely talented sent me some pictures of some everyday items that she had altered and just like that, I now had a plan for it.

It has been sitting in my kitchen for years, being a catch all for everything under the sun. It was time to make it into something. With my friends inspiration and a little work.. I did just that.

The paper I chose is CTMH. I have loads of the paper packets that I have sadly never even looked at. I fingered through the stack until I found a pattern set that I thought would suit this project.


I have been collecting items for so long that sometimes I forget what I have just waiting to be used.. I grabbed what I thought I may need and started in.

I lightly sanded the wood so that the glue and the paper would adhere a bit better. I have never used mod podge before, but I am pretty sure I will be using it more in the future because it worked perfectly for what I was trying to do.

I had over the years collected so many making memories paints, and honestly the only ones in my house that ever used it, were my kids. I grabbed up a few matching colore and a brush or two and worked them into this project.. Before I knew it, I was almost done turning "everyday" in to something "WOW!"

Since I started the project at home, I had to wait to get back to work to put the finishing touches on it because a good majority of my "fun stuff" is at my shop.


Once I got it to work with me, I sorted through some embellishments until I found a few that I thought would really give some extra life to my project, and I wasn't disappointed with what I found.

I have sat on so many supplies for so long that I am more happy with the fact that I am actually using things from my stash than I am about making new and exciting things.

I didn't realize how great this project could actually be until I started to use all the things I had "saved for a special project."

This helped me to see that EVERY project is a special project, and rather than stare at my "Pretty things" all nice and organized, I enjoyed using them finally. I am very pleased with what I created... a true trash to treasure creation that is functional...

I hope you have enjoyed this project with me and it inspires you to use your stash and not save it for something down the line. Thrift stores and yard sales are a great place to find items to make your own.  Create something magical.